The ClickAndGo Wayfinding App is an aid to help you in navigating unfamiliar areas and complex buildings such as bus stations, college campuses, airports, hotels, and other venues. The app is available for free and completely accessible using VoiceOver and other accessibility tools which are built-in to your phone or tablet.
Installation and Use
1. Downloading the ClickAndGo App
2. Venue Information
3. Routes
4. Landmarks
5. Virtual Tours
6. Restaurant Menus
7. “Favorite” Venues
Downloading the ClickAndGo App
Go here to download the Wayfinding app from the iTunes App Store.
Click here to download the ClickAndGo Wayfinding Maps App User Guide.

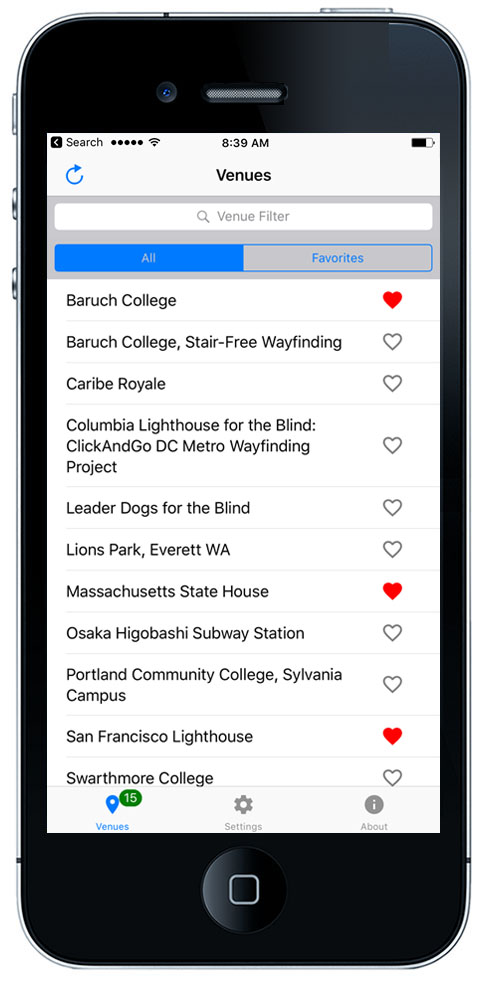
Upon opening the app and passing the welcome screen, you will be asked to choose from a list of venues. You can filter the list using the Venue Filter near the top of the screen. Upon selecting a venue, you have a few options.
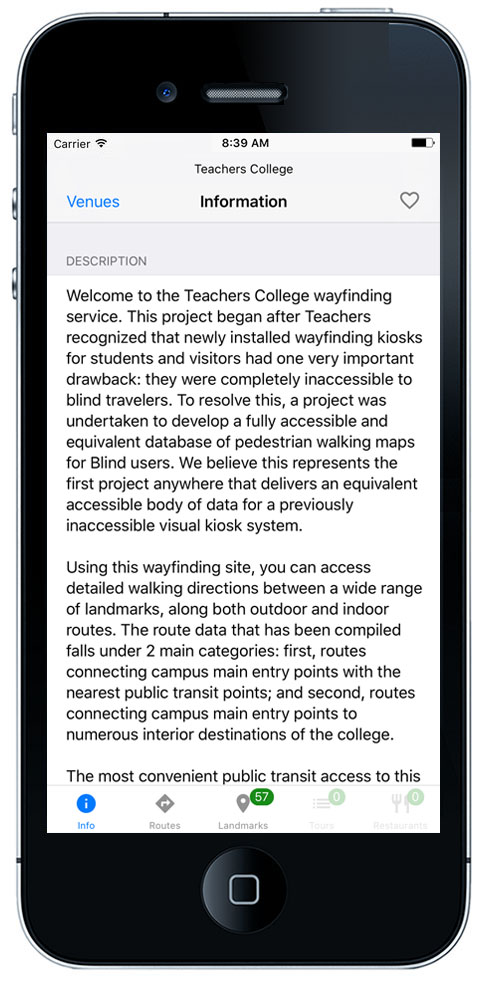
First, an Info tab is displayed. This gives a overview of the venue, and may also include specific information about the scope and details of the wayfinding project at that location.
Here, you can also add or remove the venue as a “favorite", making it easier to return to it in the future. You can navigate between any of the venue's tabs by selecting one of the tabs on the bottom of the screen. VoiceOver users should focus the desired tab and then double tap to select it.
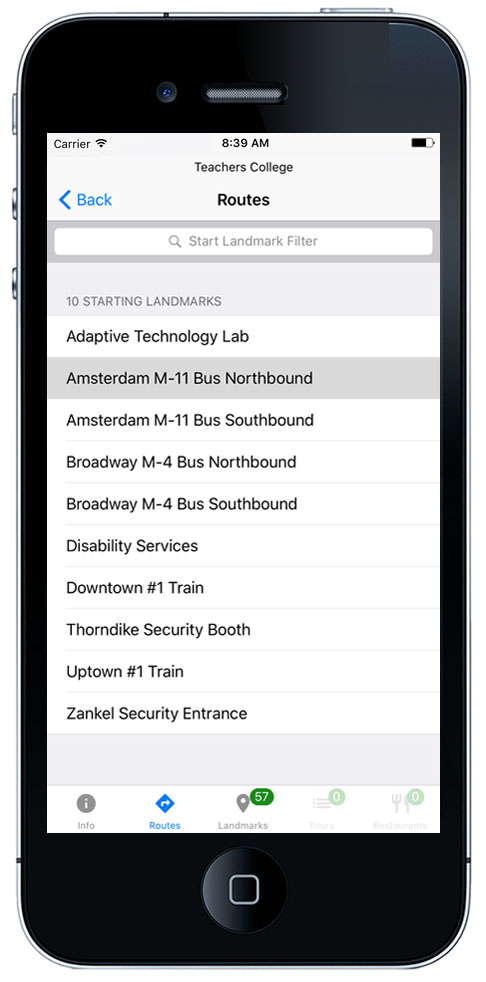
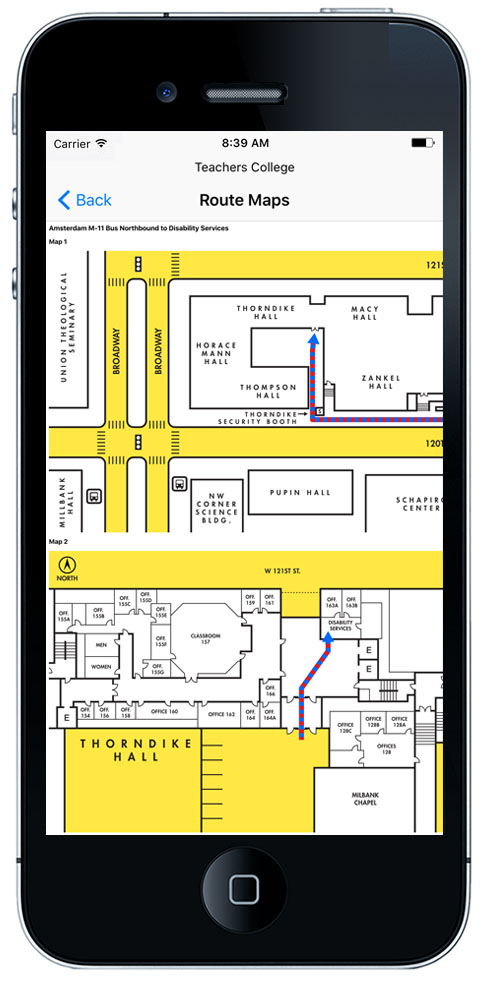
The next tab is the Routes tab. If you select Routes, it leads you to a screen that lists starting and ending landmarks.
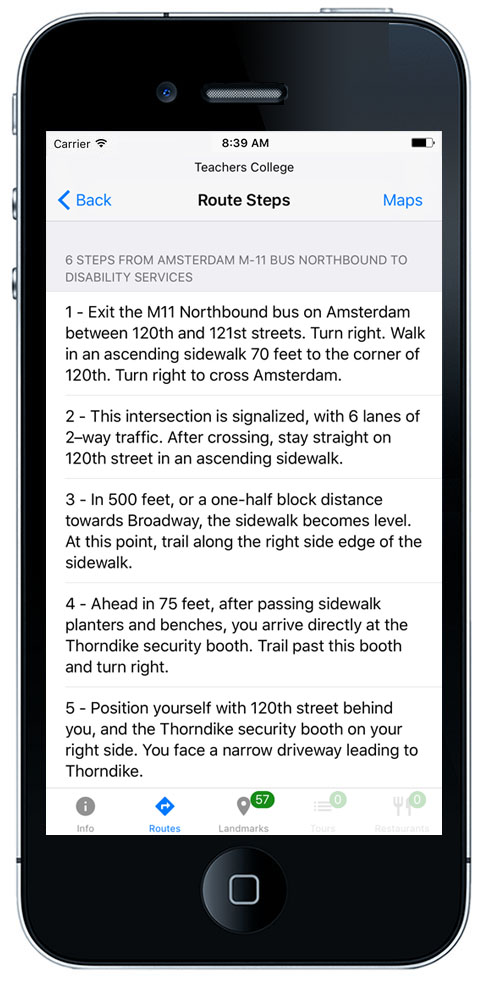
Select “Starting landmark” if you know where you want to begin a route, and wish to see the list of possible destination points. Once “Starting landmark” has been selected, a list of all possible ending landmarks populates automatically. Once you choose an ending landmark, the route will then be shown in numbered “steps”.
Alternatively, select “Ending landmark” if you know where you want to end a route, and wish to see the list of possible starting points. Once “Ending landmark” has been selected, a list of all possible starting landmarks populates automatically. Once you choose a starting landmark, the route will then be shown in numbered “steps”.
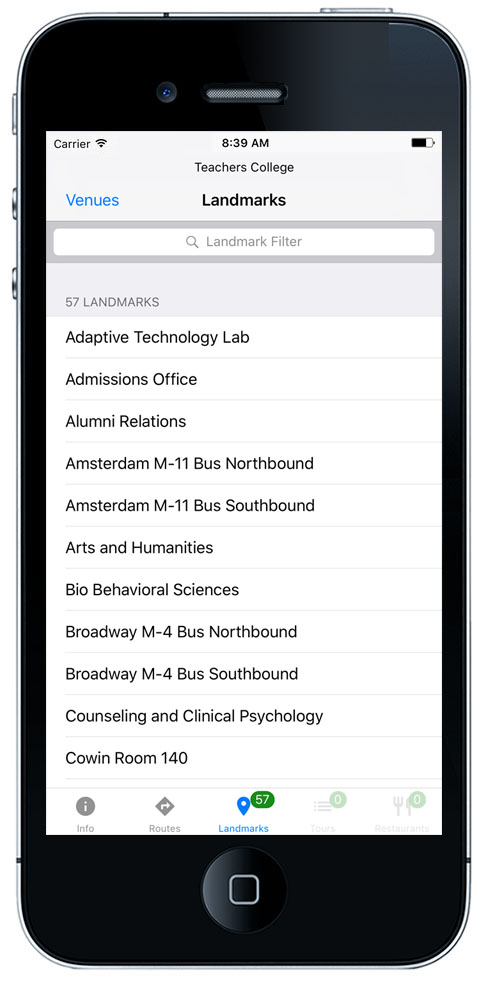
After the Routes tab is the Landmarks tab. Landmarks are presented in a list, and these may also be called "points of interest". Examples of landmarks are building entrances, office doors, bus stops, or other places where you may wish to navigate.
You can browse through the list of landmarks until you find one you are interested in. After selecting it, a screen is shown which gives general info about that landmark and also lets you plan a route to or from that location.
You will see two buttons such as "One route begins here" or "Two routes end here". Routes that start at this landmark go from the location to somewhere else, while routes that end here go from another location to that landmark. Select one of the available buttons to view available routes.
Virtual Tours provide a descriptive narrative of an area such as a restaurant, hotel lobby, or outdoor area. Select the Virtual Tours tab on the bottom of the screen to find a list of available tours for a venue. Select a tour to read the description.
Some venues, such as hotels, offer accessible restaurant menus. Select the Restaurant Menus tab to view available menus for the venue. Once on this screen, select a menu to read it.
You can mark a venue as a favorite so you can easily find it later. This can be done in two ways. You can either select the Add as Favorite button from the venue information screen, or use a VoiceOver custom action from the list of venues if VoiceOver is turned on.
To do this, navigate to any venue and then perform a swipe up gesture with 1 finger until you hear Add as Favorite, then double tap to select. You can remove a venue as a favorite in the same way.
ClickAndGo Wayfinding App Features
Route Directions
Virtual Tours and Pre-Journey Learning
Intersection Descriptions
Points of Interest (POI)
Restaurant Menus
Customized Low Vision Maps
Communicates with NextGen Talking Signs to give real-time location support using iBeacon technology
Screenshots